Often times, when providing your own Minecraft hosting solution, you’ll have the need to run multiple servers within your network (Aka, hosting from a home server). This is easily do-able, all you need to do is run the secondary Minecraft server on a different port. This approach has a major downside however, players will now have to specify the secondary port number in their client to connect. For example, you have two servers hosted at 123.456.7.890, to connect to the one running on the default port, all you need to do is enter the IP address, and you’re good; the second server runs at 123.456.7.890:25566, so players would have to enter that to connect.
I’m going to solve this problem for you today, it will only take you about 10 minutes! Luckily for us, Minecraft servers support SRV records, or Service Records. This allows us to specify a port number, for a domain in our DNS records. Sounds scary, but I promise you its not!
The use of a SRV record, requires that you have a domain name. Domain names are cheap and easy to purchase, I will not cover that in this topic, but I’d recommend GoDaddy; that’s also what I’ll be using in this tutorial.
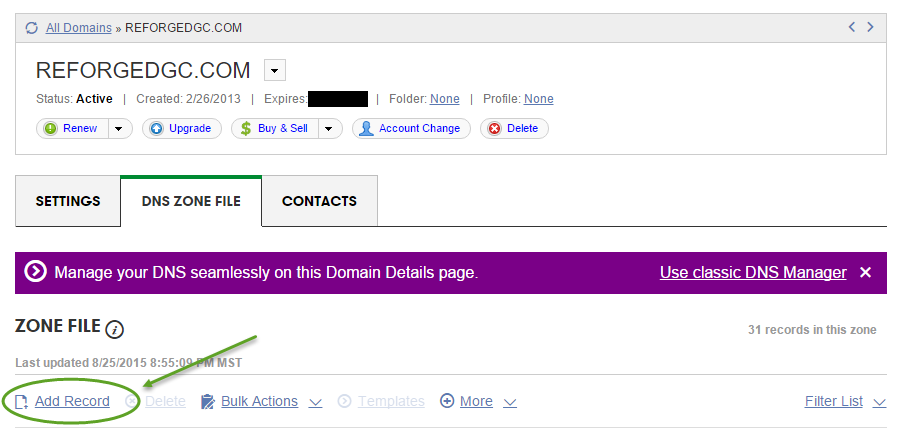
Within your account on GoDaddy’s website, select “Manage” next to the desired domain you want to host these servers with. From there, select “DNS Zone File” to edit the records for your domain.
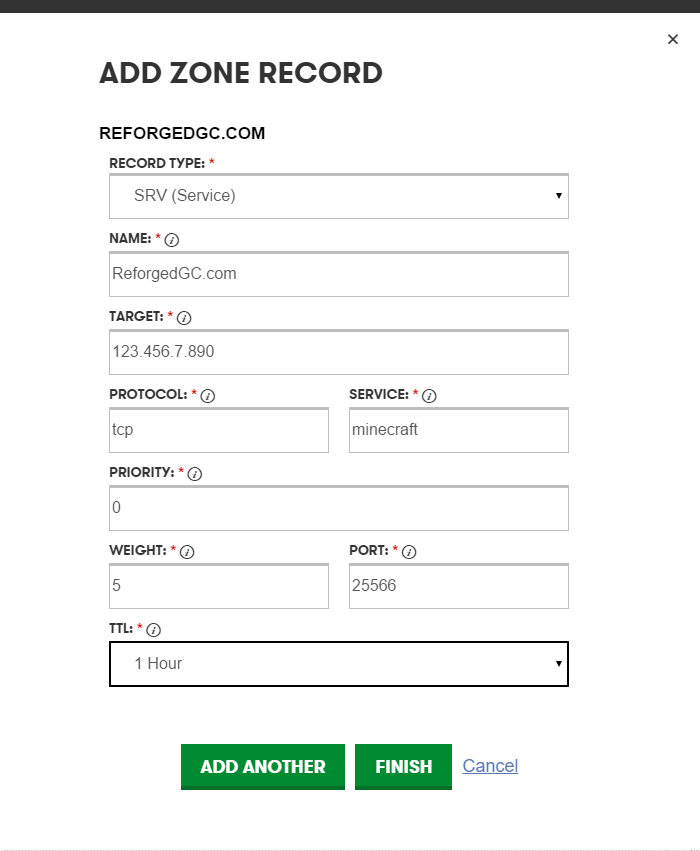
A window will pop up, and ask you to select a “Record Type”, select SRV (Service). This is where you’ll enter all the details for your SRV record, here is what each field means:
- Name: The domain name you selected.
- Target: The hostname of the machine, ( or domain name, like your home DDNS ).
- Protocol: Put TCP here.
- Service: The name of your subdomain (aka, minecraft for minecraft.reforgedgc.com).
- Port: The port you selected for your secondary minecraft server.
Note: You’ll need to set up the subdomain now if you haven’t already.
Thats all there is to it, you now have your subdomain pointing to your Minecraft server running on a non-standard port. The players will not have to enter your custom port number when connecting, making it easy to remember!


