Custom Snippets
In Visual Studio Code, you have the ability to create custom code snippets that are available via Intellisense. This is really useful when you want to get things done quickly, as there is no limit to how complicated the code in the snippet can be!
If you haven’t tried Visual Studio Code yet, you’re missing out on one great, open source, cross platform code editor. If you have, you’ll know it has a modern UI that is really quite simple, leaving a lot of the options to be configured in JSON files. Custom snippets are handled the same way, you create a JSON file (it will be generated for you) and add your template; let me show you how.
New Snippet
To create a new code snippet, simply go to File > Preferences > User Snippets in Visual Studio Code’s main menu. After that, you will be prompted to select a language for the snippet. Snippets are created by editing a <language>.json file, inside you will find that the file contains an example for us already.
Lets go ahead and make a new JavaScript template, that helps us add some comment blocks to help facilitate better code documentation. Inside the template, I’ve added the following JSON object for my snippet:
{
	"Comment Block": {
		"prefix": "cblock",
		"body": [
			"/*",
				"|--------------------------------------------------------------------------",
				"| ${1:Title}",
				"|--------------------------------------------------------------------------",
				"|",
				"| ${2:Description}",
				"|",
				"*/"
		],
		"description": "Creates a comment block for well documented code."
	}
}
The above JSON object defines our new snippet. The object key itself is just a name, prefix is the actual intellisense command, the body is the output, and the description shows up under the command in intellisense.
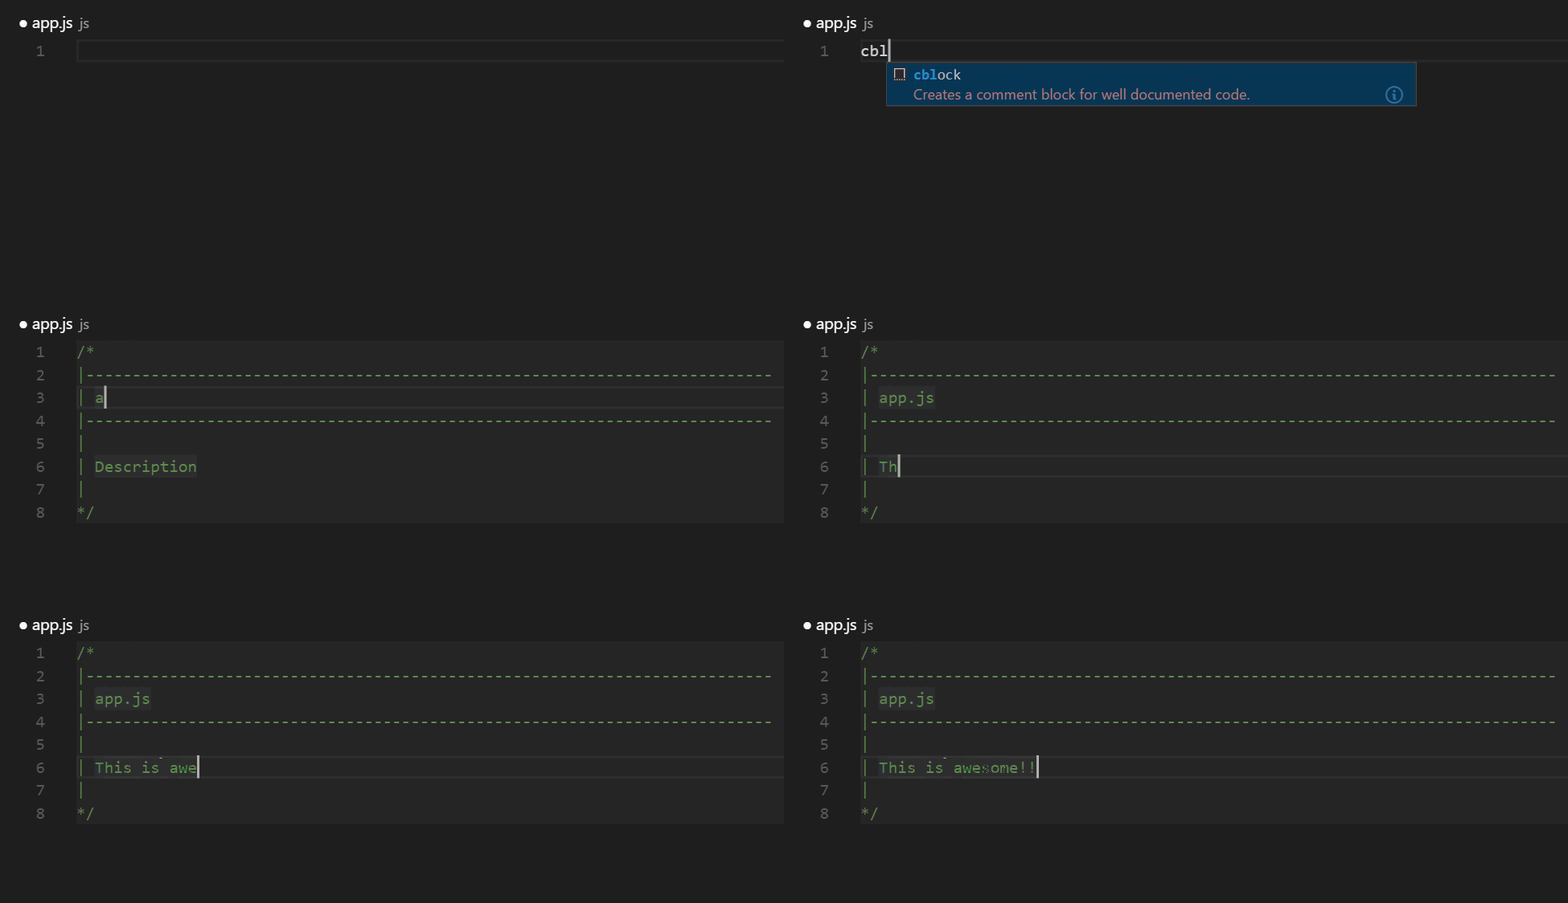
Lets see our new cblock snippet in action!

As you can see, the Title and Description are selected via the Tab key, as you would expect the included snippets to work. How did we do that? Using the simple variable syntax, like ${1: Title} or ${2:Description}.
Variable Syntax
You can create variables in your snippets quite easily. Using the variable syntax of ${foo:bar} we can do some really useful things that will speed your development time. Every time you define a variable, you will be able to press Tab and jump to its location in your snippet. There are a few things to note however, using nothing but a number ($1) will provide a blank place for the cursor to land, but if you use a value (${1:Foo}, you get a placeholder of “Foo.” Variables are also connected to each other, if you define $1 two places in your code, both will get updated with the same value!
Another example
Lets apply what we know now and take this a step further. Lets say you’re an Angular 1.5 developer, and you find yourself creating a lot of factories that need the same structure each time. You could always copy and paste from the last factory you made, or you could make a code snippet that will help you generate this quickly… lets do that instead!
"Angular Factory": {
	"prefix": "angularFactory",
	"body": [
		"function ${1:Name}(${2}) {",
		"\tvar service = service || {};\n",
		"\t${3}",
		"};\n",
		"${1}.$inject = ['${2}'];\n",
		"angular",
		"\t.module('${4:Name})'",
		"\t.factory(${1})"
	],
	"description": "Barebone Angular 1.5 factory."
}
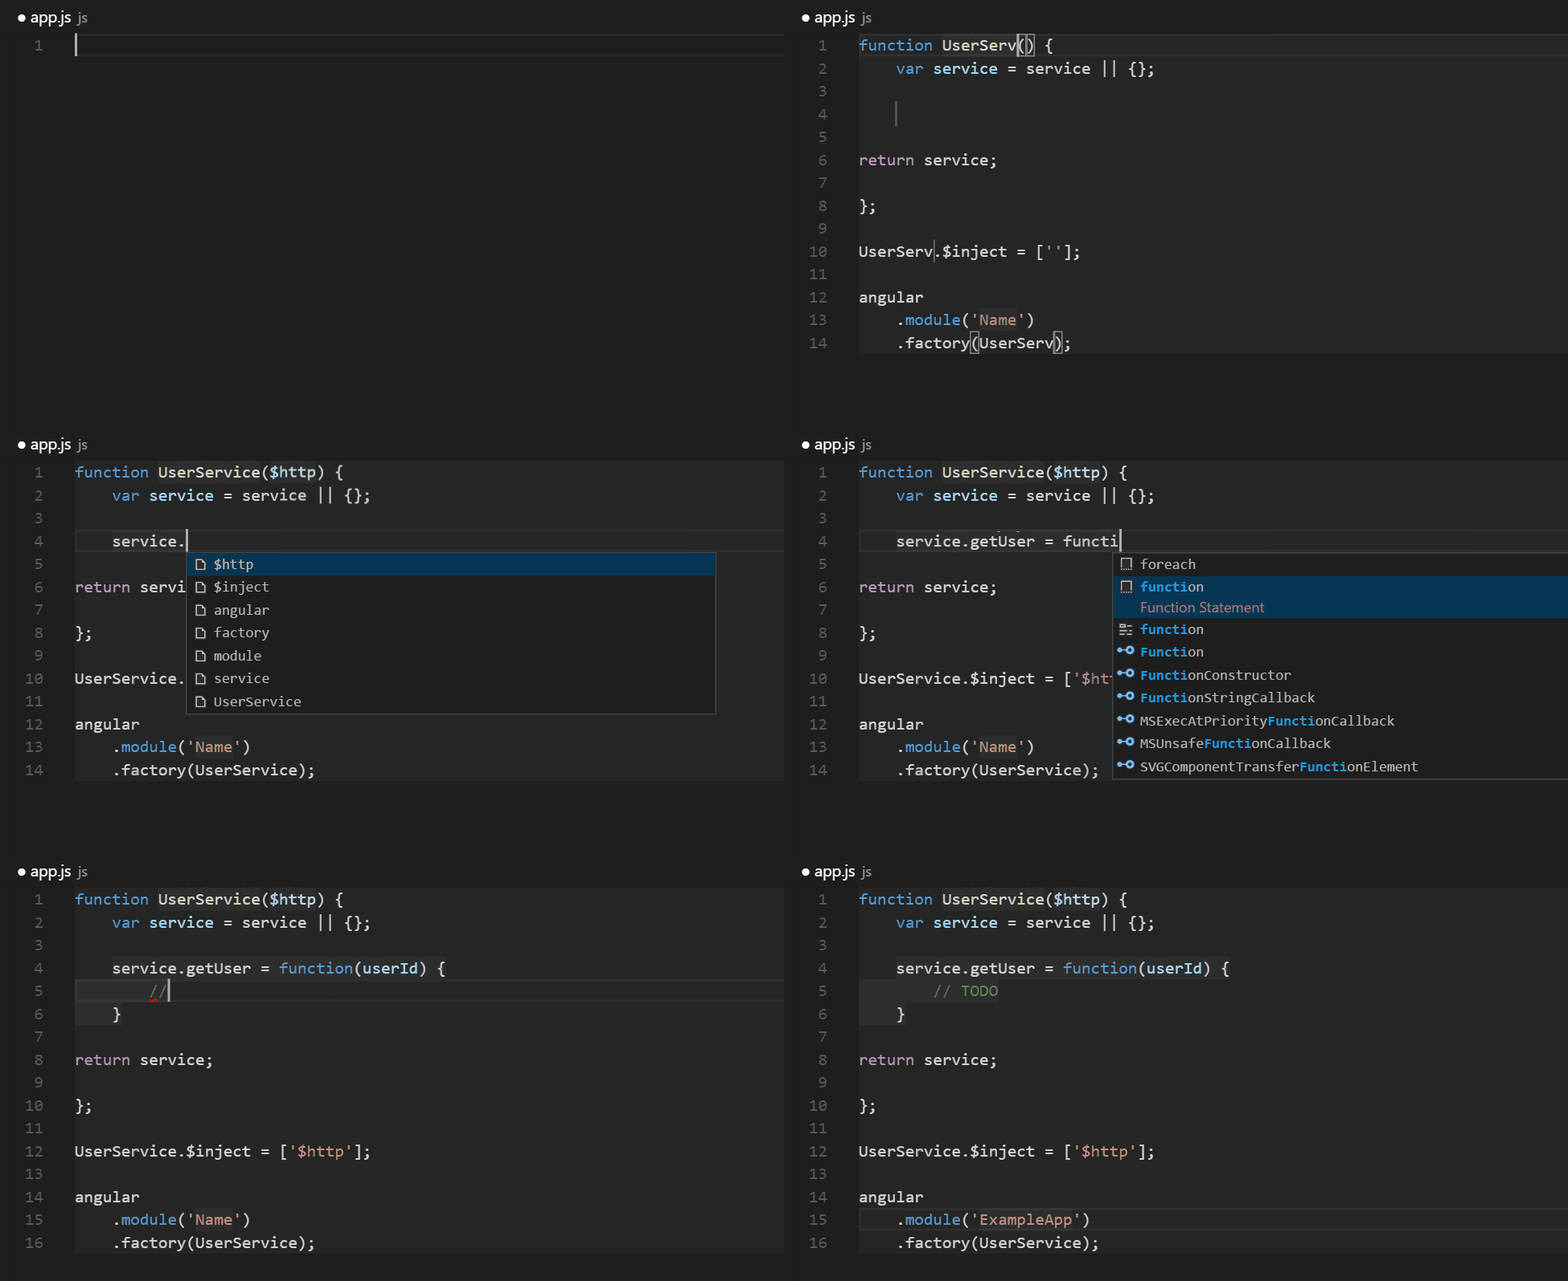
Have a look at the snippet above, you’ll notice we have a ${1} in there three times. That is because we want to use that value multiple places, when the user enters ${1:Name} the function before “$inject” and the one we pass into “.factory()” is populated.
Lets go ahead and use this snippet to create a UserService for our Angular app:

Wrapping up
Hopefully this demonstrates the effectiveness of creating custom snippets! Take this one back to work and impress your boss with your new and improved speed!
The official documentation on snippets can be found here.

